
Conditions d’achèvement
Consulter
If you click on the “Users” button in the menu on the left side it will open the overview about the currently existing user accounts in your system.
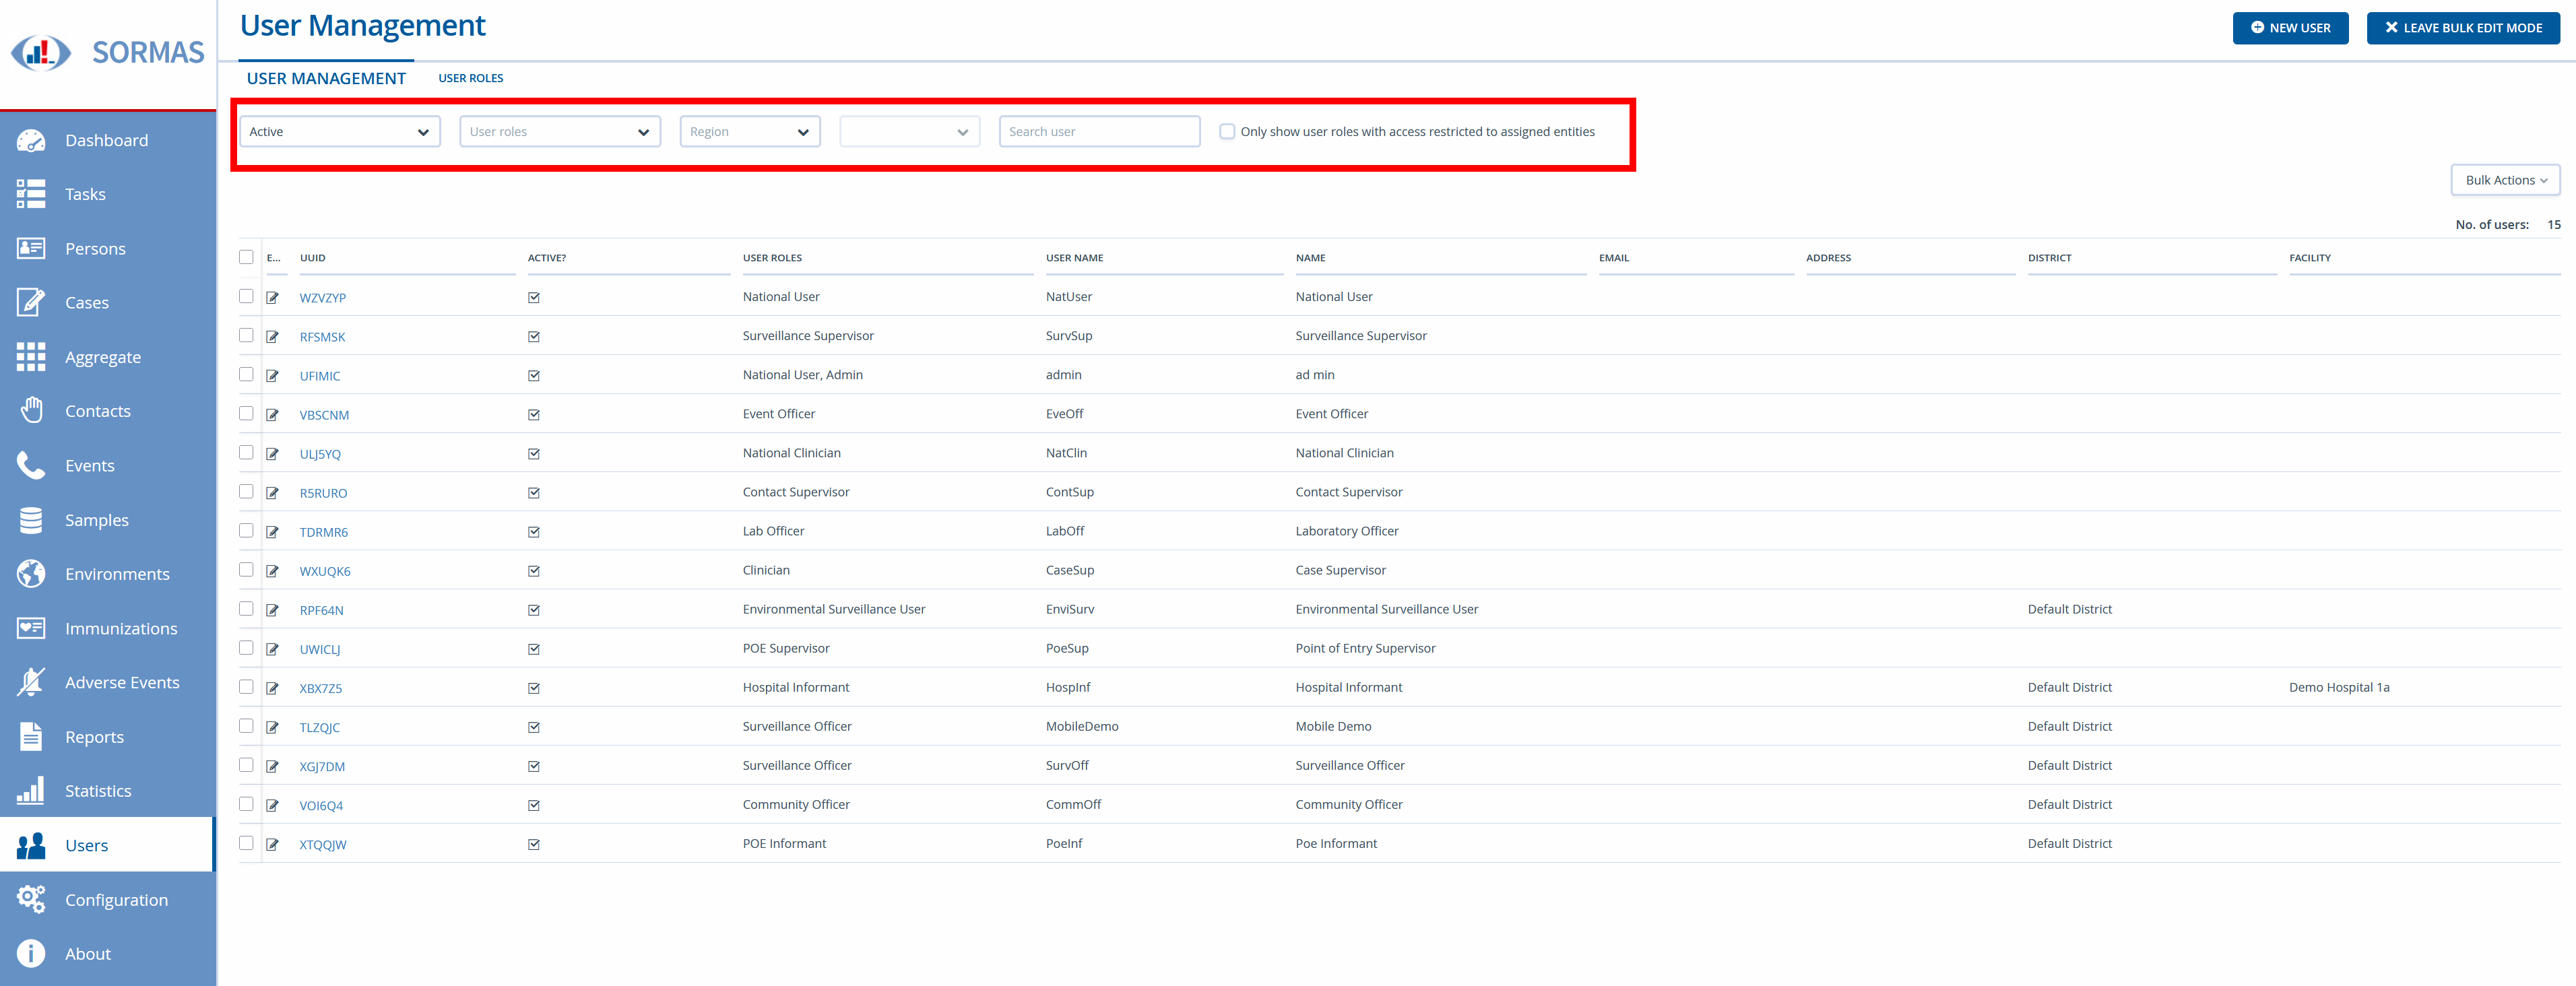 |
At the top, you have the option to filter the user accounts to make it easier for you to find the one you are looking for in an environment that could include hundreds of user accounts.
The available filters can be combined with each other and have the following effect:
| Active? | Show only active or inactive user accounts. |
| User Roles | Show only user accounts that have a specific user role attached to it. |
| Region | Show only user accounts that are responsible for a specific region. |
| District | (Only visible when you select a value in the “Region” filter). Show only user accounts that are responsible for a specific district. |
| Search User | Search for a specific user account’s name directly. |
| Only show user roles with access restricted to assigned entities | Show user accounts that have a role attached to them where the value “Restrict access to assigned entities” is set. |
If you have found the user you are looking for you can click on the icon in the “Edit” column of the table to open the user account and make changes to it.
For the purpose of this course, we will focus on creating a completely new user account, but the information you will learn shortly is also applicable for editing an existing account.
If you click on “New User” in the top right, a popup will open where you can configure a new user account.
 |
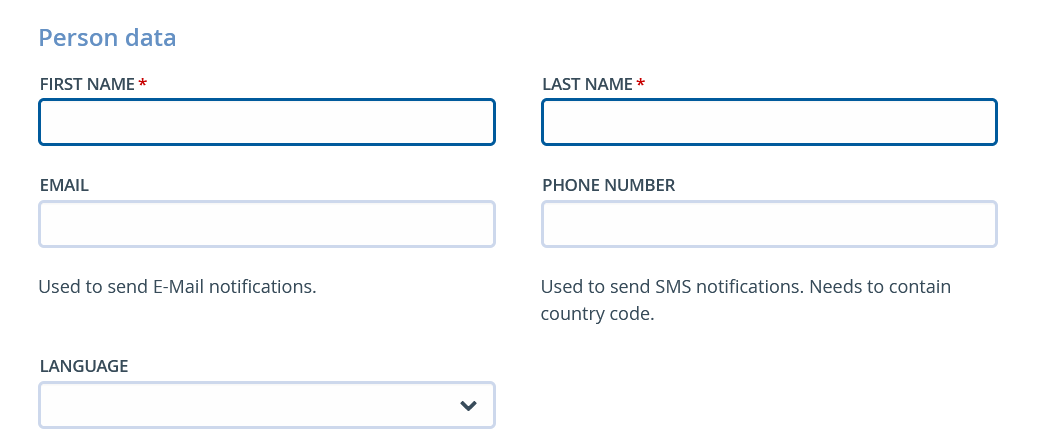
This window is split up into four different sections. Let’s go through them one by one.
Person Data
|
First Name
|
 |
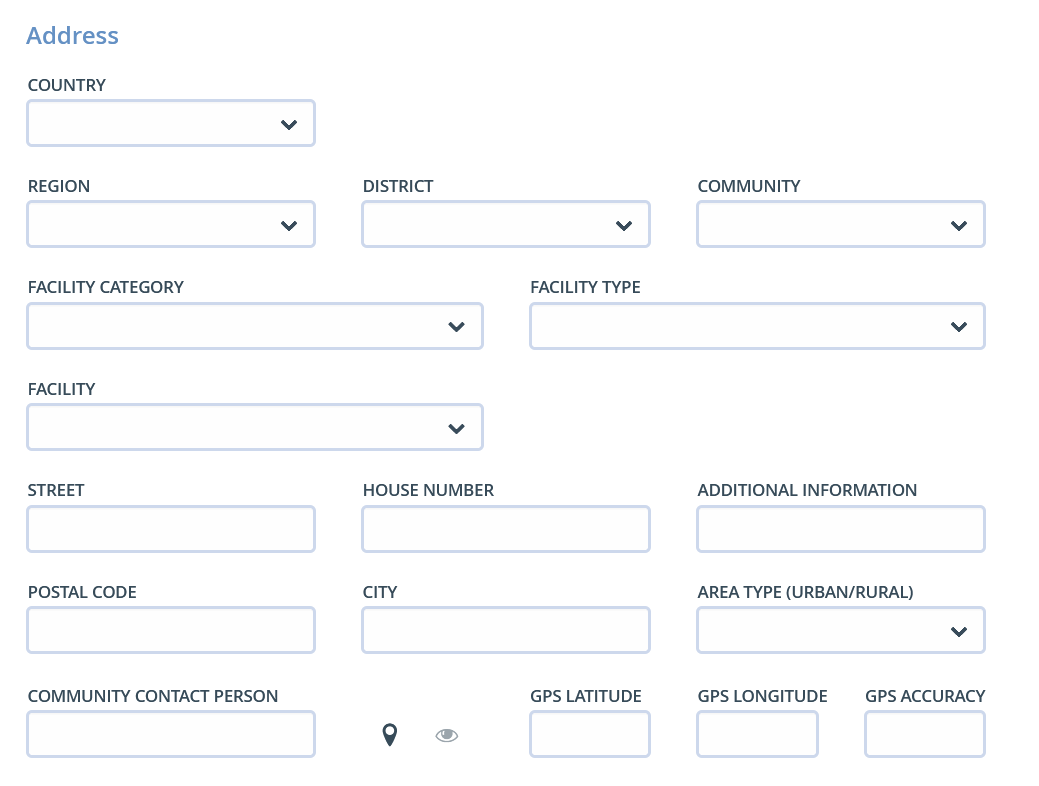
Address
All the information in this section is purely informational and does not affect what a user can see. All values are optional.
|
Country
|
 |
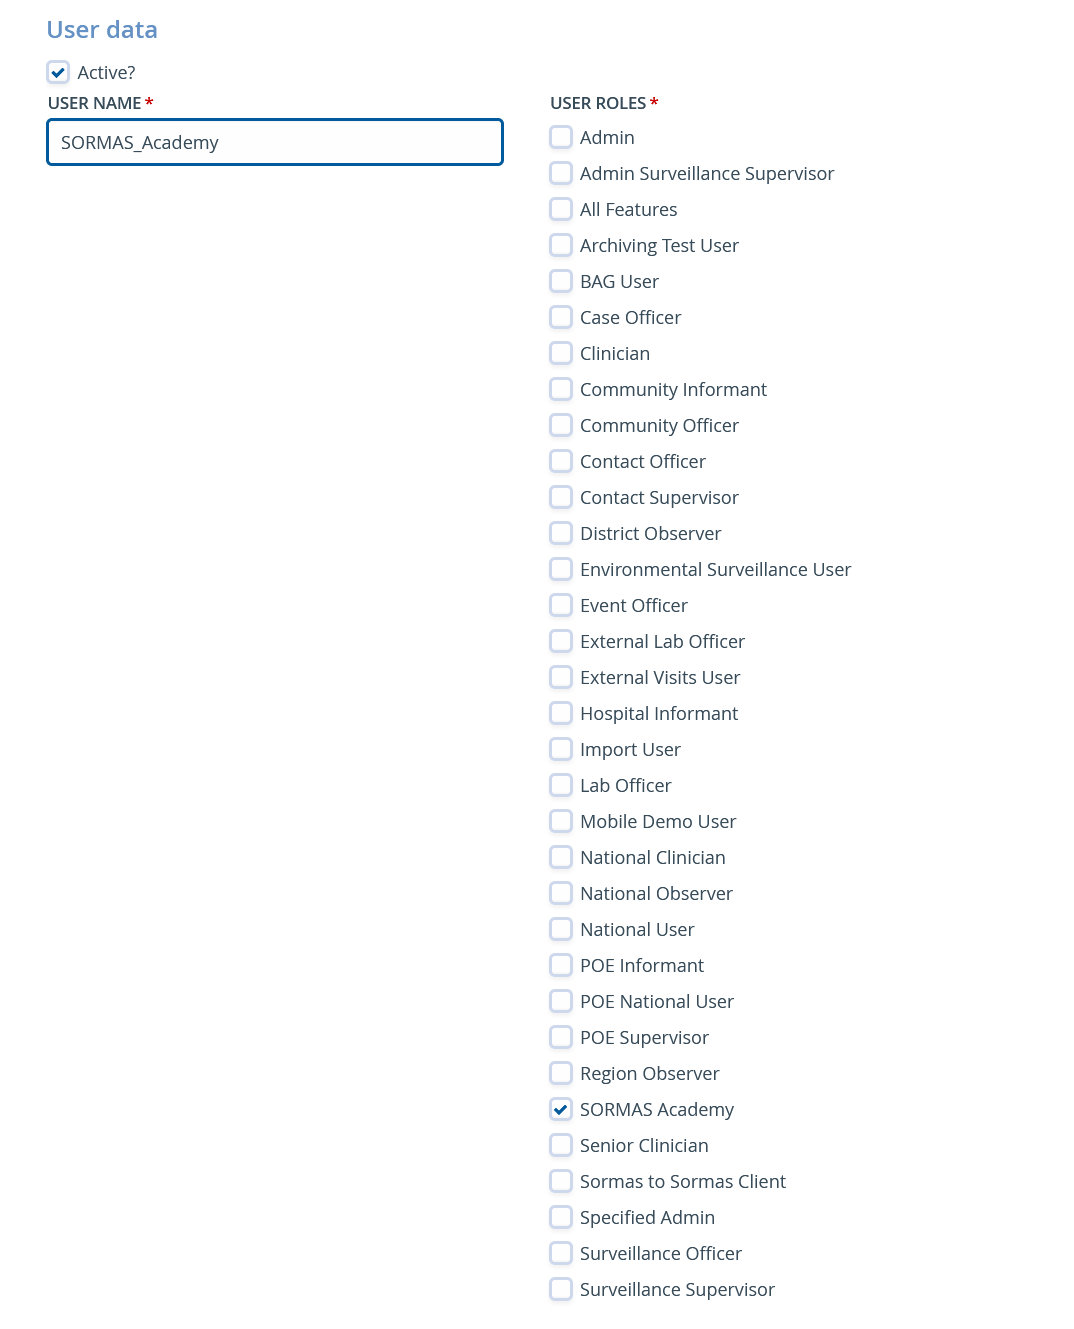
User Data
|
User Name
Please note: |
 |
Disease Restrictions
| In this section you can restrict access of a user account to only specific Diseases. The list contains all diseases that are set to active in the disease configuration and you can select as many diseases as you want. | 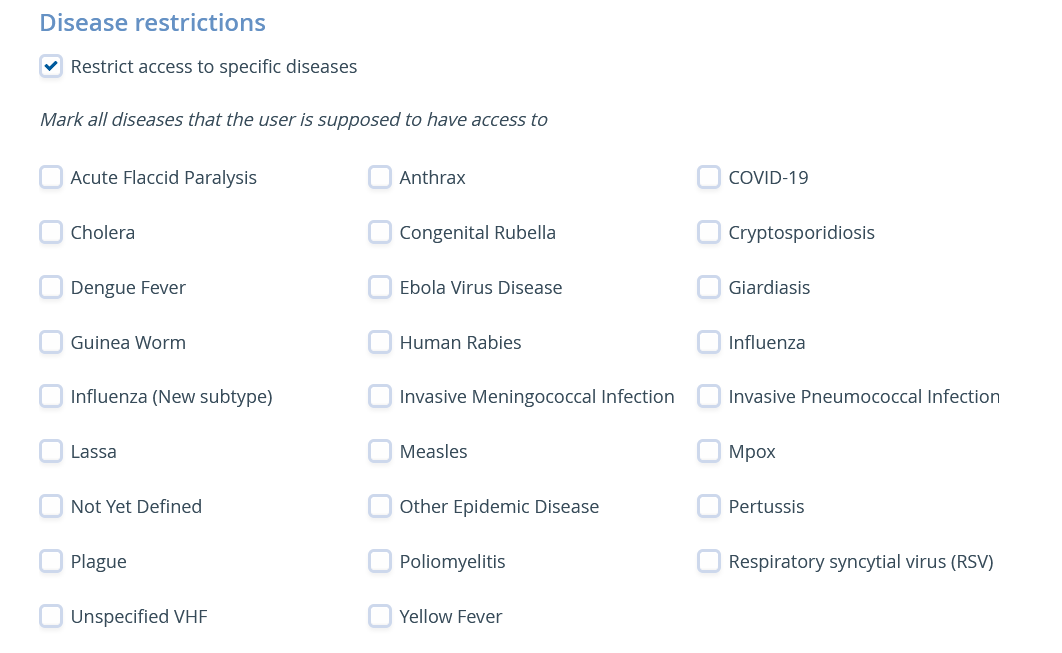 |
Modifié le: lundi 18 mai 2026, 15:48